30 November 2010

Apple Crumb Pie

Okay, I know Thanksgiving was last week. But it's still the "Season of Baking," so I wanted to share my all-time favorite pie recipe. The "I can't wait to eat this pie" recipe. The pie even my husband (Mr. Diet Desserts) loves and can't get enough of.

Apple Crumb Pie. The words alone make me salivate.

And, the kicker is, I don't like apple pie.

Unless it's my own, that is. I'm picky that way.

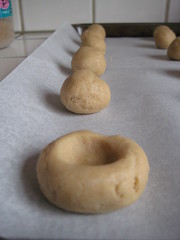
Start with a pie crust, either my All-Butter Pie Crust or one of the refrigerated kind. Roll it out and put it in your pie plate. Then refrigerate until your filling is ready.


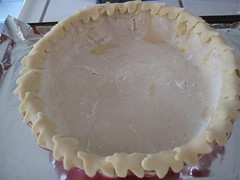
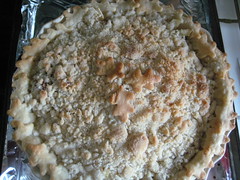
Because I made my pie for Thanksgiving, I used an extra crust and cut out leaf shapes for the edge. It made it look elegant.

(Also note that the pie in the picture was made in a 10" pie plate. Those refrigerated crusts are not big enough for that size pie; you'd have to use about one and a half of them. I made crust from scratch and I made and extra half of a crust so it would fit in the plate. Normal pie plates are 9" and you'll be fine with a regular size crust.)

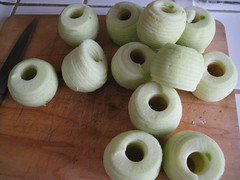
Now for the most important part: the apples. I use Granny Smith apples for my apple pie. For a regular 9" pie you would use 5-7 regular sized apples. For this pie I use a 3-pound bag of the small Granny Smiths, since the pie was so big. You can peel the apples with a potato peeler or by hand, or use an apple peeler. I found mine years ago at one of those kitchen  shops in an outlet mall. The great thing about it is that if I set it up, a helper peels them for me...


I like to make my apples thin. Luckily, this peeler slices them as well as peels them, so all I have to do is cut them in half.


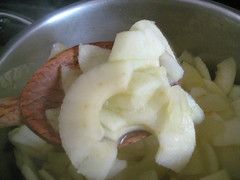
Now here is where my recipe differs from so many others I've found. I cook my apples before adding them to my pie.

Shocking, I know. But, if you say you don't like apple pie because of the texture of the apples, this will take care of that problem. I can't stand rubbery apples; they make me a little queasy. Cooking them slightly before baking ensures they will be soft and swallowable.


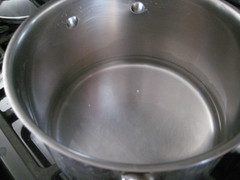
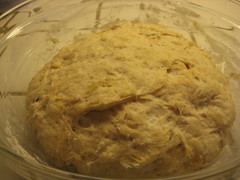
Add about an inch of water to a pot and add your apples.  Cover and cook over low heat, stirring occasionally for just about 5 minutes after the water boils. (This will depend on the thickness of your apples.) You want them slightly opaque, but not mushy. Drain them and let them cool slightly before adding them to the pie crust. Here's how they look after cooking:


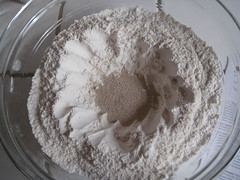
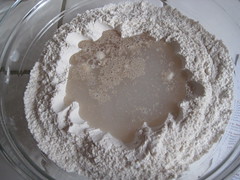
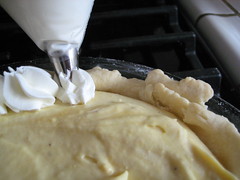
While the apples are cooking, I make my crumble topping. This is the same recipe I used for my blackberry crumble tarts at the end of summer. Butter, flour, and sugar. Yum!


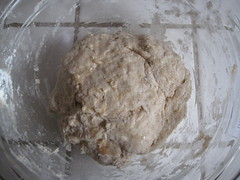
I like to use slightly softened butter. Not room temperature, but not straight from the fridge either. It makes it easier to blend with the flour and sugar. You can use a fork or a pastry cutter to mix the ingredients for the crumble. When it's done, it should look like coarse crumbs, some the size of a pea.


Add your apples to the pie crust and top with sugar and cinnamon. Top that with your crumble topping.


Put your pie on a cookie sheet during baking because it will bubble over slightly and you don't want all that burned gunk on the bottom of your oven. Using thin strips of foil, cover the edge of the pie crust. Otherwise the crust will brown too fast, and the bottom will still be raw. It's a tricky process (one strip falls off, you put it back on, a different one falls off...but it's worth the effort!)


You can make the pie a day ahead of time, just refrigerate it overnight. I like my apple pie warm, so during dinner I usually stick it back in the oven on the "warm" setting (or, if the oven is warm from cooking dinner, just turn it off and let the pie sit in there and get all toasty warm). Serve with ice cream (my favorite!) or whipped cream.


Oh, and another tip. Wear leggings when serving. The first slice leads to two, and who wants to unbutton their jeans at the table?


Enjoy!

24 November 2010

Happy Thanksgiving!

Happy Thanksgiving to all of my readers! I'm sorry I haven't posted in the past week or so. I'm hosting Thanksgiving this year and have been in prep for days. Of course, I'm taking pictures of all of my food and will be posting some of my best recipes in the coming weeks.

I want to wish you a wonderful time with family and friends this holiday! Cheers!

Dorothy

16 November 2010

Pizza Crust

I love pizza. Who doesn't? Some people love it for the cheese and toppings, some love it for the sauce or the whole experience of it. What do I love about pizza? You guessed it. The Crust! It's bread topped with cheese. What's not to love?

In the past I'd always avoided making pizza at home because of my fear of yeast. I was always scared I would do something wrong and would kill the yeast and my dough wouldn't rise. I'd subsisted on take-out pizza (delicious), Boboli (so-so) and the crust-in-a-can (not so great). Then I read a recipe in Food Network Magazine for pizza crust (without a bread machine) and I thought, why not? I'll try it.

And it was wonderful. Make a double-batch-and-eat-it-all wonderful. Now I either make it myself or we order it out (but not nearly as often).

It's super easy - if I can do it, so can you!

  
Whisk your flour and salt in a large bowl. Make a well and add your sugar and yeast.


Add your water (warm, not too cold, not too hot) slowly and let it sit until you see little bubbles.

This is what it looks like after kneading; before rising.


Then stir (I use a wooden spoon; it's too sticky to do by hand at this point) until the dough comes together. At that point, get in there with your hands and knead the dough until it forms a ball.  Cover and let sit on the counter until it doubles in size, about an hour and a half. (You can do it in the fridge if you have to make it longer ahead of time and it will rise slower.)  Here's how it looks after rising:


I apologize for the photo. I'm still figuring out the best "it's evening and it's dark in here" light in my kitchen!

The recipe makes two pizzas, so divide the dough in half before stretching and rolling it to your desired size. I like a thicker crust, so I usually use a little more than half my dough. You can use a rolling pin, but I find stretching with my hands works the best.  Place your stretched out crust on parchment paper on an overturned cookie sheet. Top with desired fillings.


I find that the pizza cooks best at 450 degrees (in my oven). The original recipe called for a higher oven temp and it burned to a crisp too fast. After about 8 minutes start checking to make sure it's not overcooking your crust.

And don't just stick with cheese! There are so many variations. I really want to try and copythe sausage and pepper pizza from Il Fornaio restaurant. Mmmmm...  For right now, we stick to cheese. It's the ONLY kind my daughter will even touch, and only then if the sauce isn't showing AT ALL.


The rest of the dough freezes, if you don't require two pizzas. Although I have been known to make two. And eat them.

Enjoy!

12 November 2010

Bean Stuff


This is one of those recipes that, when mentioned, causes instant salivation for me. It's a recipe I grew up with that I hope to pass on to my daughter someday (if she ever gets over her pickiness and actually tries it). When I think of this recipe, I remember sitting around the dinner table with my parents, each of us silently praying to have the last piece.

Bean Stuff. It's a great name, don't you think? It's got "beans and stuff" in it. I've seen similar recipes over the years, recipes titled "Taco Pie" or "Tortilla Pie", but those just aren't the same. It's probably the memories that make it taste so good (and the tortillas and cheese), but I hope you'll enjoy it just as much as I do.

It's super simple to make and easily adaptable to your needs (low-fat or vegetarian). There are only 4 ingredients. You can make it ahead of time and cook it in the microwave. It's a great Friday night dinner (easy, delicious, and just a little sinful).


Enjoy! And Happy Friday!

09 November 2010

Pecan Piookies


Countdown to Thanksgiving:  T-17 days.

Now that November is here, I'm thinking about Thanksgiving. A lot.  I'm hosting this year (which I am very excited about) so I am paying extra attention to recipes in magazines and blogs. One of the blogs I read had a great idea that I'm totally going to do. Instead of making a pecan pie (because I'm already making apple and pumpkin and probably something chocolate) I'm going to make Pecan Piookies. A little taste of the delicious pie in a few small bites, and you don't have to feel guilty eating a slice (or two or three) of the other kinds of desserts. It was a genius idea! (Plus, you can make them ahead and freeze them, freeing up time for other baking the day before!)

I'd come across this recipe years ago and always wanted to try it. So when the Hospitality Committee at Jordan's school called for desserts for a potluck, I volunteered right away. (I never can say no, especially to a baking or a cooking request!)

These cookies are simple, yummy, and even a touch elegant. Make your batter and roll into 1 1/4 inch balls. I place mine on cookie sheets lined with parchment paper (and a Silpat). I always use parchment for my cookies. For one thing, it makes them easy to remove from the cookie sheet - no sticking. And the best part is that the cookie sheet stays moderately clean so washing is super easy.


Then, using your thumb or the back of a wooden spoon (I find that if you have any sort of fingernail, using the spoon is your best bet) make an indentation in the center of the cookie. Wiggle the spoon a bit to spread out your opening so the filling will fit.


The one thing I would change about how I made these cookies for next time would be to chop the pecans smaller. See how big they are? I thought they were okay in size until I started filling the cookies. They pecans had a hard time staying inside. I chopped them by hand this time, but next time I will use my food processor and chop them finely.


Fill your cookies and bake. Let cool for a few minutes and then remove them from the cookie sheets. This is where you will thank me if you have used parchment paper. :)


Plate and enjoy! You could even sprinkle them with a bit of powdered sugar for a really nice serving look.


Happy November!

05 November 2010

The Easiest Beans


This is the simplest recipe ever. And it's SO tasty, you'll never go back to canned refried beans again.

I really wanted to make myself a taco salad a few weeks ago but ran out of canned refried beans.  I really wanted that salad, so I went to the internet. I found this recipe on Pinch-My-Salt, a blog that I follow. I used black beans (my favorite) and one bite in I knew I had a keeper recipe. The only problem I see with this recipe is that I eat the whole thing. Even though beans are good for you, somehow I don't think eating a whole can in at one time is!

You can add cheese and use it for chip dipping, as shown in the photo. Or, make a taco salad by crumbling up the chips and adding shredded lettuce. Or use them in your favorite recipe.  However you choose to use them, they are delicious!

Happy Friday!

The Easiest Beans
Ingredients:
1 can (14.5 oz) black or pinto beans
2 cloves garlic, pressed in a garlic press
1-2 tablespoons canola oil (or use bacon grease, as Pinch-My-Salt did)
Salt and pepper to taste
Salsa or hot sauce, if you wish

Add the oil and crushed garlic in a medium saucepan over medium heat.  Cook for just about 30 seconds, then add your beans, with their liquid.  Use a potato masher to crush the beans to your desired consistency. (If you prefer a dryer refried bean, add less liquid.)  Cook for a few minutes until bubbly.  Add salt and pepper to taste. If you want a spicy bean, add some salsa or hot sauce. Enjoy, and try not to eat them all in one sitting!

02 November 2010

Banana Cream Pie

A few weeks ago my parents came to help us with some trees that needed to be taken down. I wanted to make something special for them, as a thank you. The hard part about that is that my dad is not supposed to eat sugar. He's not diabetic, but as a precaution he is supposed to limit the amount of sugar he eats. The problem is that he (and the rest of my family) LOVE sugary treats and desserts. It's very hard to find good recipes with low or no sugar. A lot of diabetic friendly recipes have sugar in them, and a lot of the Splenda recipes I've found also include regular sugar (or taste funky if they are all Splenda).  I guess they assume that the person they are made for will limit their intake of such foods. "Limiting" is not a word used to describe my family. A pie will last less than two days!

The day before they were due to arrive, I walked into the kitchen and saw these, and I the idea of what to make popped into my head.

I decided to make banana cream pie, which is easy to turn into a very low sugar dessert, by using sugar-free pudding mix

The Banana Cream Pie I grew up on consisted of a pie shell, pudding, and whipped cream. I wanted to add my own touch to it, so I sauteed the bananas ahead of time and blended them into the milk used to make the pudding. It added a more natural banana flavor to the pudding. I also made my own whipped cream.  You can find the recipe for the all-butter pie crust here.


I sauteed the bananas with a little brown sugar (yes, not sugar-free, but so good!) and some butter.


Then I blended the bananas into a little milk, to make banana-milk for the pudding.


After you make your pudding with the banana milk, add a little of the whipped cream to make a fluffier filling. (You can also use cool whip to save time! They even sell sugar free cool whip at some grocery stores.)


When you are pre-baking your pie crust, be sure to poke holes in it with a fork so that it won't bubble. You can also cover the bottom with foil and use pie weights or dried beans. Even with the poking, check part way through baking so that you can poke any bubbles that happen to evade your poking.


Fill your pie and top with whipped cream. If you want to be all "fancy" you can pipe it on with a star tip, as I did here.


So, yes, there was some added sugar (from the bananas and the whipped cream). But, that could be easily remedied by using sugar-free cool whip and not using sugar on the bananas. Or, if you don't worry about sugar intake, use regular pudding and go all for it when adding sugar to the bananas and whipped cream. :)

And, yes, it was gone in (less than) two days!!! But, hey, it's almost winter and my hips appreciate the extra warmth.