20 December 2010

For the Doggies in your life...

I do a lot of baking at Christmastime. I bake for neighbors, friends, teachers, family...and dogs. Let me explain.

Up until a couple years ago, we only had our cat, Callie. She's really worth a blog post all her own, and if you know her you know what I'm talking about. Anyway, Callie is notoriously picky (she won't eat treats) so usually her monogrammed Christmas stocking was filled with wet cat food. Actually, if I'm being totally honest, I never really thought about making cat treats for her. I laughed at those people on TV who treated their dogs like children.  And then we got Ginger.

Kirkpatrick Photography

One look at that face and I go all softy. (Like, "No dogs on the couch!" became "Sure sweetie, come on up here, you want to be more comfortable????" on the first night we had her.)

So, needless to say, when I'm baking for Christmas I also include Ginger in my baking plans. And her friend Tess and "cousin" Clancy.

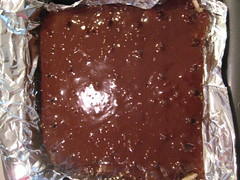
Last year was my first time trying a doggie recipe. I made Carob and Peanut Butter Bark from Everyday with Rachael Ray magazine. It was good enough for us humans too. And it's beyond easy.


Carob is a dog-friendly alternative to chocolate, since chocolate is poisonous to dogs.


Melt the carob in the microwave at 50% power in 30 second intervals, stirring in between, until melted. Spread on a parchment lined cookie sheet.  Melt your peanut butter in the microwave for 30 seconds and add it to the carob. Swirl, chill and you're done.


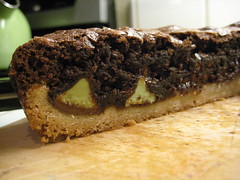
This year, while making gingerbread for a cookie-decorating party for my daughter, Ginger was all over me. The smell of the gingerbread was driving her crazy. I gave her the tiniest piece and she almost took off my hand she wanted it so bad. So, I decided to make doggie gingerbread. I found this recipe from all-natural-dog-treat.com and decided to give it a try. It's similar to regular gingerbread, but with no eggs or dairy.


It rolled out easy - almost better than regular cut-out cookie dough. Much less sticky (probably because there is no butter in them).  I have a Scotty Dog cookie cutter but thought that was just a little...wrong. So I made gingerbread men instead.


I had some extra carob chips left over from the bark recipe. Since the cookie man was kind of small, I used them as buttons. I used a toothpick to make eyes and a nose.


They dried out very well and were very crunchy. What about Ginger, you ask? What did she think?


(That's her, licking her chops.) So I think it was a good recipe!


Hopefully the other doggies in Ginger's life love the treats just as much as she does.

Merry Christmas! Woof!

17 December 2010

Rudolf the Red-Nosed Cookie


I'm sure you've seen these cookies at one time or another, either on the Pillsbury website or in a magazine. I've always seen them and thought they were so cute, but never had a reason to make them, until this year. I needed a cute and easy recipe for Jordan's Kindergarten class party and I remembered these cookies. They are one of those cookies that taste good and look like you've spend tons of time on them, even though you haven't. Perfect for a busy week filled with class volunteering, baking, and getting ready for the holidays.


I started with Pillsbury refrigerated dough. Sure, I like homemade sugar cookies better, but in the interest of time I used a shortcut. (And, I was feeding kids, who don't know the difference!) Cut them as close to the same size as you can and bake them according to the directions on the package. (The recipe on the Pillsbury website says to shape the roll into triangles. I thought about doing that for about two seconds, then figured the kids wouldn't care. Good call on my part, they didn't mind at all.)


Then, gather all your decorating ingredients: chocolate chips for the eyes, M&M's for the noses (or you could use cinnamon candies), miniature pretzels for the antlers, and, of course, icing for the glue. Now, again, I prefer homemade icing to the canned kind but, in the interest of time, used store-bought icing. (I don't like to think about what's in it - like what the "artificial flavor" means. But, being completely honest, it's so good. I've been known to eat leftovers with a spoon. I'm not kidding. Just ask my thighs.)


Then decorate. Two eyes, two antlers, a red nose. Press them in a bit into the icing. Cover the cookies loosely for awhile and the icing will somewhat harden (but not completely). It was fun giving them different eye expressions, like the one in front who is cross-eyed.

I was told the kids loved them. I know I did, not only were they cute, but they were pretty darn tasty too.

Enjoy!


Printer-Friendly Recipe

14 December 2010

Caramleized Onion Tartlets

Are you sick of all those parties yet? Hosting one of your own this weekend? Here is a great recipe I found on Food Network. It's by one of my favorite TV hosts, Sandra Lee. (This recipe is from her Semi-Homemade show. I love watching that show - if only to see what her new valance is!)  I've changed a few things from her recipe - for one, I used fresh onion. I also used ricotta cheese instead of goat cheese.

These tarts are really good, even for people like me who aren't wild about onions. The onions get sweet when you caramelize them. They pair really well with the ricotta too. And you know me well enough by now that if it has a crust I'll probably enjoy it.

The hardest part about this recipe is pressing the pie crust into the mini muffin tins. It's time consuming, but worth it. Save yourself the hassle and use the refrigerated crusts. Unroll the dough and cut out your circles for your mini muffin tin.


I don't have a 2 1/2" round cookie cutter, so I used a small glass. Just make sure it is close to the size you need.


Now press your cutouts into a mini muffin tin. The recipe said I'd get 24, but I only got 23. (I probably could have re-rolled the extra crust and gotten a few more.)

Now it's time to make your onions. Slice them thin and add them to heated pan lined with olive oil and butter.  Add some sugar and salt and cook until caramelized. Here's how mine looked:


I only used one onion and my tartlets could have used more. So I suggest using two medium sized onions. They are onion tarts, after all.


Mix together your ricotta, egg, cream, and thyme. I added it to the tartlets with a spoon. You can also use a pastry bag or a ziploc bag (leave a little section open for air to escape and snip one corner).

 
Fill your tartlet shells with onions.  Then top with your ricotta mixture. Bake for 10-15 minutes at 375 degrees until they are browned. Cool for a few minutes and remove from pans.

(The pan on the left is silicone. I highly recommend them if you are asking for pans from Santa this year. It's super easy to remove things from a silicone pan. I sprayed the nonstick one with cooking spray and still had to use a butter knife and lots of patience to remove the tartlets without ruining them!)


Yeah, 23 didn't quite make it to the plate. Mmmm...good!

Happy Partying!

10 December 2010

Peanut Butter Chocolate Bark


Ahhh, peanut butter and chocolate. The perfect marriage. And one of the most popular combinations for treats this time of year. I've made this bark each year since I first saw the recipe in Everyday with Rachael Ray magazine. It's sinfully sweet and delicious and is a hit at parties. And it's great for mailing. It has all the things I love about a treat: salty, sweet, and crunchy. I think what sets this bark apart from so many others is that, instead of just being chocolate, it has a crunchy crust made of Matzo crackers.

Let's get started. First, the happy couple emerge from the cabinet.


Here are Matzo crackers. They are similar to saltines in texture, but are made of only matzo flour and water. They are most commonly used as a substitute for bread during the Jewish holiday of Passover. If you can't find Matzo (usually in the International section of the grocery store) you can substitute saltine crackers instead.


First, you lay out your crackers on your foil covered cookie sheet. Break the crackers as needed to fit.


Next melt your unsalted butter in a saucepan. Mine is a three quart heavy-bottomed pan. I think you need to be sure and use unsalted butter here. Peanut butter can be salty and, if you're like me and are at the store asking yourself "did I wanted unsalted crackers or salted???", then there is probably salt there too (because I always end up buying salted ones).


Once the butter is melted, add your sugar and 2 tablespoons of water to the pan. Now you need to break out a kitchen tool I'd never owned or used until I found this recipe.


The candy thermometer. I don't know why I was always scared to use one. They are super easy to use, and helpful too.


Cook your butter and sugar (not touching it!) until the temperature on the candy thermometer reads 255 degrees.


Not there yet.


Or yet.


Almost there! Now, when it gets to the right temperature, remove the pan from the heat and let it sit a minute.


Stir in your vanilla. Makes it bubble a lot. I wonder why?


Pour over the crackers and use a spatula to spread it evenly. Bake in a 350 degree oven for 8 minutes.


Now for the chocolate! Sprinkle your bag of chocolate chips over the bark. Bake until the chocolate starts to melt (about 2 minutes). The chips will become glossy looking.


Meanwhile, melt your peanut butter in a microwave safe bowl until it has a pourable consistency, about a minute to a minute and half.


Once the chocolate chips have started to melt, spread the chocolate evenly over the bark. Pour your peanut butter over the top. Mmmm....


Swirl the peanut butter and chocolate together with a spatula or the back of a wooden spoon. Be sure to get a lot on the spoon, so you can lick it when you're done.


Let it set for an hour, then refrigerate for at least 2 hours. Break it apart and package for giving. And enjoy a piece or two or five for yourself.


Well, I'm done with my first official "Christmas baking" recipe. So many more to go! More recipes to come!

Happy Friday!

07 December 2010

Shortbread Crust (with Brownies on top!)


As soon as I saw this recipe on a blog I read (Picky-Palate), I knew I had to make it. It's all the things I love: brownies, shortbread, and Hershey's Kisses.  All in one recipe! And I knew instantly that I wanted to use the peppermint flavored Kisses (the white ones with the red candies sprinkled inside). I love the combination of peppermint and chocolate.

You start this recipe by making a shortbread crust. (Which, by the way, I'm excited to find other uses for.) Butter, brown and granulated sugars, and flour get mixed together and pressed into the bottom of your pan.


Now, the recipe I was working from called for an 11x7 inch baking dish, which I don't have. The brownie mix was for a 9x13 inch pan, so I used that. Very soon after I started adding my Kisses (about 50, distribute them evenly) did I start getting nervous about not having the right sized pan.


Can you guess why I was worried? I'll get back to that in a minute.


Now make your brownies, according to the box directions. (I'm still looking for a good, easy brownie recipe that's not from a box.) Then add to your pan.


Oops, now you can really see why the 11x7 pan was needed! The kisses are too tall. (I remedied this during baking by tapping the tops down after they had gotten hot and melty. The frosting then covers any imperfections.)

Wait until they are cooled completely and then cut into squares. For the frosting, I used white chocolate chips instead of more kisses, as the original recipe called for. I thought the peppermint flavor would be too strong if I melted more Kisses for the top, so I used white chocolate. You can melt it in your microwave (using 50% power in 30 second increments, stirring each time) or a double boiler. (I make my "double boiler" by boiling water in a sauce pan and placing  my chips in a bowl placed on top of the pan. Just make sure the bowl doesn't touch the water.)


As you can see, they turned out pretty good. The only problem I had with them was that the kisses didn't stay white. But they were delicious. Sinfully sweet. Hearty, like a meal. I was satisfied; a new recipe to add to my collection.

And then a friend of mine showed me these:


And I thought to my self: "Oh my goodness, I have to make those brownies again!"

So I did. And I think Jordan's teacher, and her friends' moms, are tired of me. Because there was no way I was leaving them in my house. Because I would have eaten them. All of them. Probably at one time.

This time I used a 9x9 inch pan instead of the large one. It covered the kisses a little better (so I didn't have to poke them during baking).


I decided not to frost this batch. I'll admit, I was feeling lazy. And, except for the fact that they weren't as "pretty", I think they tasted just fine, maybe even better than the ones with the frosting. I had meant to sprinkle the top with Christmas sprinkles since I wasn't adding frosting, but I forgot. (That's what I get when I bake while Jordan is having a playdate.)

What do you think? Don't you wish you had scratch and sniff for the computer?

  
The kisses held their shape better this time (probably since I wasn't poking them!) And the green truffle center kept it's color too.


Okay, I think I need to stop looking at these pictures now. Yes, these bars are so good that I'm seriously considering making another batch right now. Because, curiously, ever since discovering them, those Hershey's Mint Truffle Kisses have had a permanent residence in my pantry.

Enjoy!