31 October 2010

Book-cakes

What's the use of having a blog, if I can't get some shameless plugs in now and then?? :)

I wanted to share something I made today for my good friend, Joann Sowles. Joann's first novel was officially released yesterday.  I made her these to celebrate this wonderful achievement.


"Laney" is a gripping novel about a young college student and the adventures she embarks on after meeting a gorgeous fellow student, who also happens to be a vampire. It knocked my socks off when I read it and I couldn't put it down. For more information about "Laney: The Brookehaven Vampires", click here.

Congratulations to Joann. 'Cheers' with a cupcake, and I wish you many more novels! (Because I can't wait to hear the rest of Laney's story!)

For the best-ever cake and yummiest-ever frosting recipe, click here. This recipe was, fittingly, shared by Joann (from the Pillsbury Complete Baking Book cookbook).

Have a great Sunday!

29 October 2010

Halloween Pumpkins

Happy Friday everyone! It's All-Food Friday here and we're celebrating Halloween!


I love Halloween. Actually, I love any holiday where I can bake desserts into a shape that represents that holiday, and Halloween is no exception. It is the desserts-that-look-like-something-else holiday.

I thought, instead of making sugar cookie cutouts that looked like pumpkins, why not make pumpkin cookie cutouts that were actually pumpkin? I went searching for a recipe for "pumpkin cut out cookies" and came up with...a lot of sugar cookies that looked like pumpkins.

So I went to my recipe binder (yes, it's a binder, complete with page protectors and hundreds of magazine pull outs and printed recipes) and found a pumpkin cookie recipe that a friend of mine had given me years ago that was very tasty. It wasn't a cutout cookie recipe, and I worried that it wouldn't roll out like a regular sugar cookie would (less butter). But, with a little tweaking, it came out great, and I have cute pumpkins and jack-o-lantern's to show for it.

The main thing I made sure to do to make it cutout-friendly was to refrigerate the dough. For a long time. It was in the refrigerator for 4 hours before I rolled it out. I know it's hard to wait that long, but overnight would work just as well (or even better). It would spread out the time spent in the kitchen, too.

The other thing I made sure to do was to use a LOT of flour when rolling. I've always been afraid to use too much flour (memories of being told "don't use too much or your cookies will be tough!") but it's necessary here. The dough is really sticky and you need to have all that flour to be able to use the rolling pin and cookie cutter.

See all that flour? But it worked - no sticking!
They didn't spread in baking and they held their shape. Perfect for icing!


I really wanted to make Royal Icing for these cookies. You always see cookies in magazines that look perfect (and are easily stack-able), and that's because they are made with Royal Icing. Royal Icing has meringue powder in it which makes the icing harden. However, with beauty comes time. And I was impatient today, so I used the glaze recipe that came with the cookie recipe. And it worked pretty good.


I dyed it orange to be more pumpkin-like. 5 drops of yellow and 1 drop of red food coloring.


Who doesn't like colored sugar and chocolate chips?  Sugar to make them sparkly and chocolate chips to make the jack-o-lanterns.

I meant for the sad one to be mad. Oh well!


Sparkly!
It's a pumpkin pumpkin cookie. Or, for those of you math geeks out there, it's pumpkin 2 .

Happy Halloween!


Thank you to my friend Bunny who share this recipe with me years ago!

22 October 2010

"All Food Fridays"

Today is the first edition of what I'm calling "All Food Fridays." I have found myself baking and cooking lots of things lately, and I want to share. So on Fridays I will be posting things that might NOT be pie related.

The idea for "All Food Fridays" came to me because of something my husband brought in one morning from the garden.


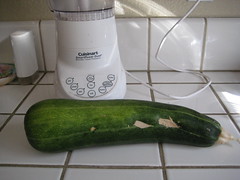
Wait, here's a different picture, to give you a better idea of size.


Yeah, that's a monster zucchini. (From a zucchini plant we thought had stopped producing. A plant that looked as if dog had actually dug it up.)

So what to do with a monster zucchini? Make bread, of course!

At this point I went to my trusty 3-ring binder (where I keep all my tried and true recipes) to find my zucchini bread recipe and it was...gone. We have a black hole in our house; one that eats jackets and suits and tarps. And, apparently, recipes. So this is one I found in one of my Betty Crocker circulars, the ones at the grocery check-out. (The October one, with Bakerella on the cover. I LOVE her!)


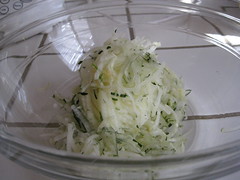
Start by shredding your zucchini. I used my food processor to make my life easier. I've had my Cuisinart for almost 10 years. When I first opened it after my honeymoon, the little attachement to make the grater part work disappeared into that black hole I told you about. Finally last month I ordered a new part. Oh, how much time I've wasted over the past decade doing it all by hand!


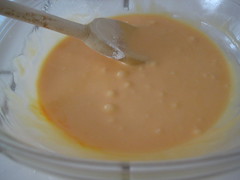
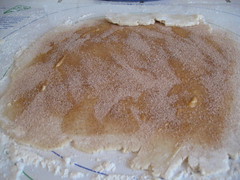
Add your eggs, sugar, and vanilla to the zucchini and stir.


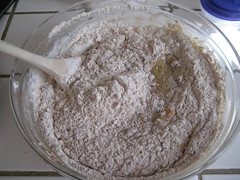
Now add the rest of the dry ingredients, except the nuts and mix well (by hand). I used a combination 2 cups whole wheat flour, 1 cup all-purpose.


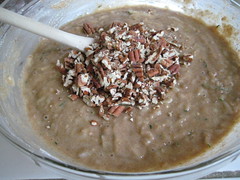
Chop and add your nuts, if you want. I used pecans, because they were closer. I was too lazy to walk out to the garage to get the walnuts from the freezer out there. But walnuts would be awesome in here too. Or leave the nuts out all together if you want.

You can add the raisins now too. I didn't. Raisins don't belong in bread. Well, they don't belong in anything, if you ask me.


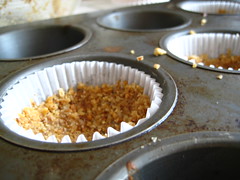
Pour into your pans. You can use two loaf pans, or a combination of large and mini loaf pans and muffin tins. Usually, one regular size loaf pan makes three mini loaves. I got three mini loaves and nine muffins.

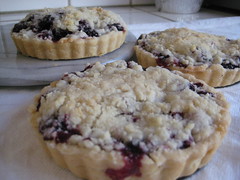
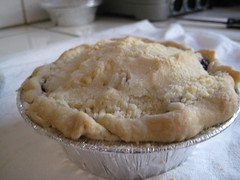
They look great, taste great, and the smell...oh my. Between the weather finally turning and the yummy smell in my kitchen, I finally feel like it's Fall!


Happy Friday!

19 October 2010

You Had Me At...

Cinnamon Sugar.  It's like the line in the movie Jerry Maguire: "you had me at hello." I hear "cinnamon sugar" and my mouth is watering.

Cinnamon sugar toast. Cinnamon sugar on a tortilla. Recently one of the blogs I read posted a recipe for Cinnamon Sugar Biscotti (Joy the Baker; and YES those are on my list of "to make").

When I was making my blackberry pies my daughter had a friend over and was begging for cookies. Not wanting to get out another whole set of ingredients, I remembered a treat from my childhood: cinnamon sugar on pie dough.

Needless to say these were a HUGE hit with the kids. And even hubby liked them (and indulged on a few along with his skinny cow ice cream cup).


Roll out your pie crust, spread with butter, and sprinkle with cinnamon and sugar.


Roll the crust tightly. Wrap in plastic and chill for at least an hour.


Slice and place on a cookie sheet.  Bake for 10-15 minutes, depending on width.


 As hard as they are to resist, let them cool so you don't burn your mouth!  :) Enjoy!

13 October 2010

Minis!

I love to bake, as you can probably tell. I love to eat what I bake too (who doesn't?)  In my house, this is the exchange that usually happens after baking occurs:

Scene: it's 8:30 pm, time for a little dessert. A freshly baked pie/cake/plate of cookies sits on the counter.

Me (cutting a huge slice of pie, because who can resist?): "Sweetie, would you like some pie?"

My husband (reaching into the freezer): "No, I'll just have this Skinny Cow ice cream cup, only 2 WW points."

Repeat scene every night until pie/cake/plate of cookies is gone, all eaten by guess who?

So I needed a way to make a pie that's smaller. Cookies, they are easy to give away or freeze (as long as they are hidden in the depths of the freezer). Cakes can be made into cupcakes, also easy to give away or freeze. But pie? You can't really give away a half-eaten pie.

What to do? The answer popped in to my head one evening (probably as I was scarfing down the 5th piece of butter pecan pie crust.)


Mini Pies! You can freeze or share them, and only eat one serving at a time! And they are super easy to make.

I started with a silicone cupcake pan, but as you can see below you can also use a regular pan, just use cupcake liners. Either way, they pop right out.


Just add scoop of your crust mixture into each liner and shape into a mini pie. Watch when baking, some recipes may require a shorter time in the oven. Fill as desired.

Genius! Now I can bake my pie and eat it too, without eating the entire thing, one slice at a time. Share and freeze, my new motto.

Enjoy!

11 October 2010

A Little Reminder of Summer...

Late August in Northern California is blackberry season. Every summer since we moved here three years ago, we've gone berry picking at a local farm. What's awesome about this particular farm is that their blackberries are thornless, thus making it a perfect kid activity. My daughter refuses to eat blackberries when I buy them from the store. However, straight off the blackberry bush? She can't get enough! I had to tell her to stop eating them, or we'd get in trouble for not paying for them.


Anyway, we brought home a huge flat of blackberries. They went into jam and ice cream and the rest went into the freezer.

Fast-forward to today, when I needed some comfort food. I remembered those berries, and decided to make blackberry crumble tarts.


Need I say more? Buttery, flaky crust, tart berries, and a sweet crumble topping. A great fall comfort food, to remind us of summer.

Blackberry Crumble Pie

3 cups of blackberries
1 Tablespoon flour
2-3 Tablespoons Sugar

1 stick butter
3/4 cup flour
1/2 cup sugar

Sprinkle 1 tablespoon flour and 2-3 tablespoons sugar (to taste) over rinsed and drained blackberries. Set aside.

In large bowl, combine 1 stick butter and remaining flour and sugar. Using a pastry cutter or fork, combine until the mixture resembles coarse crumbs.

Roll out pie crust and add to pie plate. (The recipe will make 3 tarts as shown or 1 9" pie.)

Add berries to the pie crust and top with crumble.

Bake at 400 degrees for approximately 30-40 minutes, watching carefully towards the end so that the crust doesn't burn. If it browns too fast, put foil around the edges of the crust to keep from cooking too fast.

Serve with ice cream or whipped cream. Yum!

05 October 2010

The One

When I think of a really good pie, it usually involves a buttery, flaky crust. Hands down, it's my favorite kind. In a way, it actually inspired this website. My husband and I were eating my apple crumb pie one day and he commented, "wouldn't it be great if we made a pie with just the crust and the crumble topping for the filling?"

And the idea was born.

Anyway, this is a version of that original crust that started it all. (That one was actually a Pillsbury refrigerated crust. That is really a great product and it was all I used until just last year, when I made a crust from scratch for the first time.)

I only use butter in my crust. I no longer use shortening in any recipes. It scares me a little - what is it, really? Why does it look like wax? Also, I used some that had gone bad in cookies one time and didn't realize it until after eating the cookies. Um, gross.

My Basic Pie Crust recipe comes from AllRecipes.com. It's buttery, flaky, and scrumptious. The recipe makes one crust, so double it for a double-crust pie. (I tend to make crumble pies most often, so a one-crust recipe is fine for me!)

Something I learned from watching Food Network: make sure all your ingredients are COLD when you make a pie crust. Cut up the butter and put it back in the fridge. Put water in a measuring cup with ice. I even add the flour and salt to my food processor and put it in the fridge for a little bit before making the crust. Then I refrigerate the crust after its in the pan, before baking. A cold crust is a good crust!

This is a small pie; this crust recipe will make two of these.


All Butter Pie Crust

Ingredients:
1 1/4 cups all-purpose flour
1/4 teaspoon salt
1/2 cup butter, diced and chilled
1/4 cup of ice water

Directions:
1. Combine flour and salt in food processor. Add butter and process until it resembles coarse crumbs. Stir in water, one tablespoon at a time, until mixture forms a ball. Wrap in plastic and refrigerate 4 hours or overnight. (Um, who has that kind of patience? Mine refrigerated for about 1/2 hour, but you probably should do it a bit longer if you can stand it!)

2.  Roll out dough to desired size and press into pie plate. Chill until ready to bake.

This recipe makes one crust. Double recipe to make a two-crust pie.

Print Recipe