Apple Crumb Pie
Okay, I know Thanksgiving was last week. But it's still the "Season of Baking," so I wanted to share my all-time favorite pie recipe. The "I can't wait to eat this pie" recipe. The pie even my husband (Mr. Diet Desserts) loves and can't get enough of.
Apple Crumb Pie. The words alone make me salivate.
And, the kicker is, I don't like apple pie.
Unless it's my own, that is. I'm picky that way.
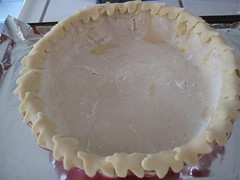
Start with a pie crust, either my All-Butter Pie Crust or one of the refrigerated kind. Roll it out and put it in your pie plate. Then refrigerate until your filling is ready.
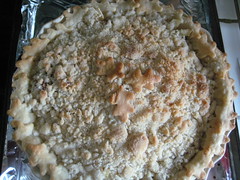
Because I made my pie for Thanksgiving, I used an extra crust and cut out leaf shapes for the edge. It made it look elegant.
(Also note that the pie in the picture was made in a 10" pie plate. Those refrigerated crusts are not big enough for that size pie; you'd have to use about one and a half of them. I made crust from scratch and I made and extra half of a crust so it would fit in the plate. Normal pie plates are 9" and you'll be fine with a regular size crust.)
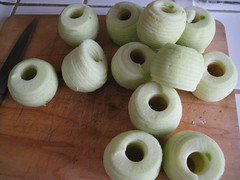
Now for the most important part: the apples. I use Granny Smith apples for my apple pie. For a regular 9" pie you would use 5-7 regular sized apples. For this pie I use a 3-pound bag of the small Granny Smiths, since the pie was so big. You can peel the apples with a potato peeler or by hand, or use an apple peeler. I found mine years ago at one of those kitchen shops in an outlet mall. The great thing about it is that if I set it up, a helper peels them for me...
I like to make my apples thin. Luckily, this peeler slices them as well as peels them, so all I have to do is cut them in half.
Now here is where my recipe differs from so many others I've found. I cook my apples before adding them to my pie.
Shocking, I know. But, if you say you don't like apple pie because of the texture of the apples, this will take care of that problem. I can't stand rubbery apples; they make me a little queasy. Cooking them slightly before baking ensures they will be soft and swallowable.
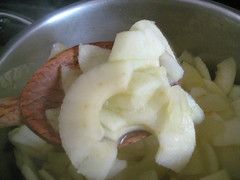
Add about an inch of water to a pot and add your apples. Cover and cook over low heat, stirring occasionally for just about 5 minutes after the water boils. (This will depend on the thickness of your apples.) You want them slightly opaque, but not mushy. Drain them and let them cool slightly before adding them to the pie crust. Here's how they look after cooking:
While the apples are cooking, I make my crumble topping. This is the same recipe I used for my blackberry crumble tarts at the end of summer. Butter, flour, and sugar. Yum!
I like to use slightly softened butter. Not room temperature, but not straight from the fridge either. It makes it easier to blend with the flour and sugar. You can use a fork or a pastry cutter to mix the ingredients for the crumble. When it's done, it should look like coarse crumbs, some the size of a pea.
Add your apples to the pie crust and top with sugar and cinnamon. Top that with your crumble topping.
Put your pie on a cookie sheet during baking because it will bubble over slightly and you don't want all that burned gunk on the bottom of your oven. Using thin strips of foil, cover the edge of the pie crust. Otherwise the crust will brown too fast, and the bottom will still be raw. It's a tricky process (one strip falls off, you put it back on, a different one falls off...but it's worth the effort!)
You can make the pie a day ahead of time, just refrigerate it overnight. I like my apple pie warm, so during dinner I usually stick it back in the oven on the "warm" setting (or, if the oven is warm from cooking dinner, just turn it off and let the pie sit in there and get all toasty warm). Serve with ice cream (my favorite!) or whipped cream.
Oh, and another tip. Wear leggings when serving. The first slice leads to two, and who wants to unbutton their jeans at the table?
Enjoy!






0 Comments:
Post a Comment
Thank you for your comment! Reading your comments is better than eating pie...and if you know me that's saying a lot. :)
Subscribe to Post Comments [Atom]
<< Home